I’m always really curious to learn more about optimization, especially as it relates to querying data. This lead me down the journey of watching this series of lectures by the CMU database group, which really opened my mind to how to get better performance out of my data pipelines.
One of the biggest realizations for me was in a slide in the CMU lectures that indicated >90% of compute usage in OLTP databases is NOT related to transactions (things like concurrency management & memory management). The insight for me was that by stripping away those requirements, I could get much faster performance. Initially, I probed SQL Server’s In-Memory OLTP functionality (aka Hekaton), but the feedback from people in my network was either “haven’t used it” or “it was a horrible experience, don’t waste your time.”
Around the same time, I was hearing a lot of chatter related to DuckDB. Install and setup was so simple, that I figured I would download it and mess around a little bit. Since I recently had done some optimization of queries related to wordle where I was able to improve query performance 53.8x, I figured it would be good to revisit it. To say I was blown away would be an understatement.
First, the process to install DuckDB is very simple. Assuming you already have some python knowledge, it’s a single-line install with pip. Adding the dbt connector was also very simple. In fact, setting up your dbt profile is as simple as:
duckdb:
  target: dev
  outputs:
    dev:
      type: duckdb
But I digress, I actually didn’t need to even get into dbt to run this experiment. Just like my previous post, I am doing the testing with this query, which looks at two lists of words for the game “wordle” and then finds the top 500 words with the most matches (for those curious, the top matching words are: orate / roate / oater). It’s not particularly fast on postgresql, clocking around 487s (8m7s) when I run it on my laptop (postgresql running under WSL2). In the previous post, I was able to get it to run in around 17.2s by using some intermediate materializations and partitioning the compute-intensive part of the query to run in parallel (and also using a faster CPU).
With DuckDB, we are doing a little surgery on the query to pull the source data directly out of CSVs. Instead of ‘FROM table’ like in postgresql (where we first load the data to a table and then analyze it next), I am using read_csv_auto in DuckDB to pull the data straight off my harddrive.
FROM read_csv_auto('C:\Users\matso\code\wordle\data\wordle.csv',header=True)
I modified the FROM clause in both of my CTEs, and then ran the query. The results honestly astonished me.
6 seconds in DuckDB vs 487s in Postgresql.
Surely this couldn’t be right! First off – the data wasn’t even LOADED into the database since I was selecting it right off of my disk. I ran it again, 6 seconds.
An 80x increase in performance.
Honestly, I don’t think there is much left to write about here, but I have definitely been contemplating how much time I’ve spent getting pretty skilled at OLTP query optimization only to see DuckDB just do it faster. Obviously, this is not a benchmark, so performance in the real world may vary tremendously, but this is certainly enough for me to really figure out how to get this to play nicely within my analytics stack.
Footnote: I replicated the same data into SQL Server 2019 and added COLUMNSTORE indexes. Query time for the base query was approx 1m30s. So 3-4x faster than postgresql (unoptimized/tuned), but still much slower than DuckDB.
That leads me to meet stakeholders where they’re at: in Excel. And modern data warehouses like Snowflake make it really easy to do so. It’s an easy win if you’ve invested in Analytics Engineering to create clean datasets in your database. Let’s bring those datasets to your users.
Here’s how to connect Snowflake into Excel and enable live connections pivot tables in minutes. These are instructions for Windows specifically.
Step by Step Instructions
(1) Install the ODBC Driver
Click on the “Help” button in the Snowflake UI, go to “Download…” and select “ODBC Driver” and “Snowflake Repository”. Install from the file that downloads.
(2) Configure ODBC Driver
Go to your start menu and type in “ODBC” and click on ODBC Data Sources (64 bit)
Under User DSN, select Add…
Select SnowflakeDSIIDriver from the menu
Fill in the boxes as follows – though your individual situation may vary. My example uses SSO when an organization doesn’t allow direct usernames/passwords for Snowflake. Lots of options here and Snowflake has full documentation of options here.
Note: I found that lots of databases & schemas are available even after choosing some here. Not sure the full limitations, so you can play with options. I put all options in for the primary database I cared about and it worked fine.
Click on Test… to confirm it worked. Here’s the dialog if it did:
(3) Connect to database in Excel
Open Excel and go to the Data tab, click on Get Data and choose From Other Sources and pick From ODBC
From the window that pops up, pick the Snowflake connection and select OK
If successful, you’ll see a window with a dropdown showing your available databases. Use that dropdown to pick the database you want.
IMPORTANT: There is an easy way to load data directly into a Pivot Table at this point (thanks Jacob for this tip!) which will save you and teams time.
Once you select the database / schema / table you want, go to that “Load” button on the bottom and click the little down arrow next to it. Choose “Load to…”
The next menu that pops up will give you various options – pick the second one down saying PivotTable Report
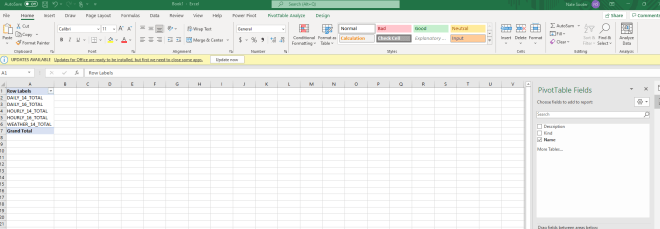
DONE. You’re there. The data is now connected live to Snowflake and is available to pivot. I used Snowflake’s sample “Weather” table which I just learned has basically nothing in it, but that’s besides the point.
Parting notes
There are a couple interesting tidbits to pass both to your stakeholders as well as anyone concerned about Snowflake compute cost & data security.
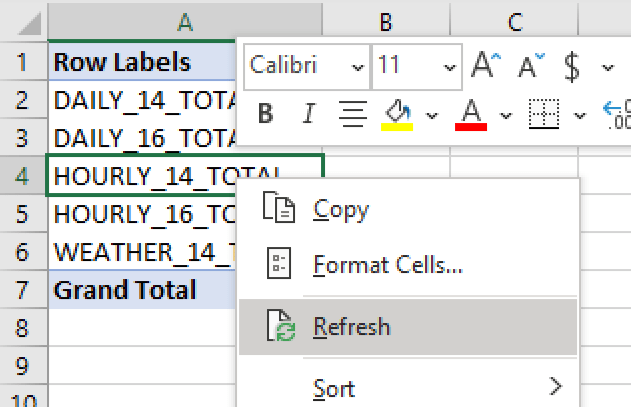
(1)Stakeholders can refresh data live from Snowflake any time. By right-clicking the pivot table and selecting “Refresh”. No more stakeholders asking you for the latest data – they can just get it anytime.
(2) Data is cached on the local machine, reducing compute costs & keeping things snappy for stakeholders. This satisfies worries from both stakeholders on performance (it’s REALLY snappy, even for huge tables) as well as those concerned on cost (compute only happens on refresh).
That’s it! Just a few installations and clicks and you’ve connected Snowflake live into Excel for any stakeholder. Happy self-serving.
Like most people, I’ve been obsessed with Wordle for the past few weeks. It’s been a fun diversion and the perfect thing to do while sipping a cup of coffee.
But of course, my brain is somewhat broken by SQL and when I saw this GitHub repo courtesy of Derek Visch, I was intrigued by the idea of using SQL to build a Wordle optimizer.
Using his existing queries, I was able to get a list of “optimal” first words. But it took forever! On my laptop, over 900 seconds. Surely this thing could be optimized.
the first dbt run of the query
For reference, you can find the query here, but I’ve pulled a point in time copy below.
{{ config( tags=["old"] ) }}

WITH guesses as (
      SELECT
            word,
            SUBSTRING(word, 1, 1) letter_one,
            SUBSTRING(word, 2, 1) letter_two,
            SUBSTRING(word, 3, 1) letter_three,
            SUBSTRING(word, 4, 1) letter_four,
            SUBSTRING(word, 5, 1) letter_five
      FROM {{ ref( 'wordle' ) }} ),
answers as (
      select
            word,
            SUBSTRING(word, 1, 1) letter_one,
            SUBSTRING(word, 2, 1) letter_two,
            SUBSTRING(word, 3, 1) letter_three,
            SUBSTRING(word, 4, 1) letter_four,
            SUBSTRING(word, 5, 1) letter_five
      from {{ ref( 'answer' ) }} ),
crossjoin as (
      select
            guesses.word as guess,
            answers.word as answer,
            CASE
                  WHEN answers.letter_one in (guesses.letter_one, guesses.letter_two, guesses.letter_three, guesses.letter_four, guesses.letter_five)   THEN 1
                  ELSE 0
            end as a1_match,
            CASE
                  WHEN answers.letter_two in (guesses.letter_one, guesses.letter_two, guesses.letter_three, guesses.letter_four, guesses.letter_five)   THEN 1
                  ELSE 0
            end as a2_match,
            CASE
                  WHEN answers.letter_three in (guesses.letter_one, guesses.letter_two, guesses.letter_three, guesses.letter_four, guesses.letter_five)   THEN 1
                  ELSE 0
            end as a3_match,
            CASE
                  WHEN answers.letter_four in (guesses.letter_one, guesses.letter_two, guesses.letter_three, guesses.letter_four, guesses.letter_five)   THEN 1
                  ELSE 0
            end as a4_match,
            CASE
                  WHEN answers.letter_five in (guesses.letter_one, guesses.letter_two, guesses.letter_three, guesses.letter_four, guesses.letter_five)   THEN 1
                  ELSE 0
            end as a5_match
      from guesses
      cross join answers),
count_answers as (
      select
            guess,
            answer,
            a1_match + a2_match + a3_match + a4_match + a5_match as total
      from crossjoin),
maths_agg as (
      select
            guess,
            sum(total),
            avg(total) avg,
            stddev(total),
            max(total),
            min(total)
      from count_answers
      group by guess
      order by avg desc ),
final as (
      select *
      from maths_agg )

select *
from final
The first optimization
The first, most obvious lever to pull on was to increase compute! So I switched to my newly built gaming PC. The environment setup is win 11 pro , dbt 1.0.0, and postgres 14 (via WSL2), running on an AMD 5600G processor with 32GB of RAM, although WSL2 only has access to 8GB of RAM. I will detail the environment setup in another post.
With this increased compute, I was able to reduce run time by 3.4x, from 927s to 272s.
getting faster
The second optimization
The next level was inspecting the query itself and understand where potential bottlenecks could be. There are a couple ways to do this, one of which is using the query planner. In this case, I didn’t do that because I don’t know how to use the postgresql query planner – mostly I’ve used SQL Server so I’m a bit out of my element here.
So I took each CTE apart and made them into views & tables depending complexity. Simple queries that are light on math can be materialized as views, where as more complex, math intensive queries can be materialized as tables. I leveraged the dbt config block in the specific queries I wanted to materialize as tables.
one query, now multiple models + 1 DAG
Simply by strategically using the table materialization, we can increase performance by 9.0x – 272s to 30s.
much better
The third optimization
Visually inspecting the query further, the crossjoin model is particularly nasty as a CTE.
crossjoin as (
      select
            guesses.word as guess,
            answers.word as answer,
            CASE
                  WHEN answers.letter_one in (guesses.letter_one, guesses.letter_two, guesses.letter_three, guesses.letter_four, guesses.letter_five)   THEN 1
                  ELSE 0
            end as a1_match,

...

      from guesses
      cross join answers
First, there is a fair bit of math on each row. Secondarily, its cross joining a couple large tables and creating a 30m row model. So in round numbers, there are 5 calculations for “guess” times 5 calculations for each “answer”, for 25 calculations per row. Multiply by 25m rows, you get 750m calculations.
Now since I have a pretty robust PC with 6 cores, why not run the dbt project on 6 threads? First things first – lets change our profile to run on 6 threads.
increase thread count to 6!
With that done, I had to partition my biggest table, crossjoin, into blocks that could be processed in parallel. I did this with the following code block:
{{ config(
 tags=["new","opt"],
 materialized="table"
 ) }}

-- Since I have 6 threads, I am creating 6 partitions

SELECT 1 as partition_key, 1 as "start", MAX(id) * 0.167 as "end"
FROM {{ ref( 'guesses_with_id' ) }}
UNION ALL
SELECT 2 as partition_key, MAX(id) * 0.167+1 as "start", MAX(id) * 0.333 as "end"
FROM {{ ref( 'guesses_with_id' ) }}
UNION ALL
SELECT 3 as partition_key, MAX(id) * 0.333+1 as "start", MAX(id) * 0.5 as "end"
FROM {{ ref( 'guesses_with_id' ) }}
UNION ALL
SELECT 4 as partition_key, MAX(id) * 0.5+1 as "start", MAX(id) * 0.667 as "end"
FROM {{ ref( 'guesses_with_id' ) }}
UNION ALL
SELECT 5 as partition_key, MAX(id) * 0.667+1 as "start", MAX(id) *0.833 as "end"
FROM {{ ref( 'guesses_with_id' ) }}
UNION ALL
SELECT 6 as partition_key, MAX(id) * 0.833+1 as "start", MAX(id) as "end"
FROM {{ ref( 'guesses_with_id' ) }}
dag-tastic!
Then I split my table generation query into 6 parts. I believe this could probably be done with a macro in dbt? But I am not sure, so I did this by hand.
select
guesses.word as guess,
answers.word as answer,

...

from {{ ref( 'guesses_with_id' ) }} guesses
join {{ ref( 'guess_partition' ) }} guess_partition ON partition_key = 1
      AND guesses.id BETWEEN guess_partition.start AND guess_partition.end
cross join  {{ ref( 'answers' ) }} answers
Then of course, I need a view that sits on top of the 6 blocks and combines them into a single pane for analysis. The resulting query chain looks like this.
I then executed my new code. You can see in htop how all 6 threads are active on Postgres while these queries execute.
why shouldn’t I use all 6 cores?
This results in a run time of 17.2s, a 53.8x improvement from the original query on my laptop and a 15.8x improvement on the initial query on the faster pc. Interestingly, going from 1 thread to 6 threads only gave us a 50% performance increase, so there were bottlenecks elsewhere (Bus? Ram? I am not an expert in these things).
17 seconds! pretty good
Real world applications
This optimization, taken as a whole, worked for a few reasons:
It’s trivial to add more compute to a problem, although there is real hard costs incurred.
The most common SQL optimization strategy I see is "increase the Snowflake warehouse size"
The postgresql query planner was particularly inefficient in handling these CTEs – most likely calculating the same data multiple times. Materializing data as a table prevents these duplicative calculations.
Databases are great at running queries in parallel.
These exact optimization steps won’t work for every table, especially if the calculations are not discrete on a row-by-row basis. Since each calculation in core table “crossjoin” is row-based, partitioning it into pieces that can run in parallel is very effective.
Some constraints to consider when optimizing with parallelization:
Read/Write throughput maximums
Holding the relevant data in memory
Compute tx per second
This scenario is purely bottlenecked on compute – so optimizing for less compute in bulk (and then secondarily, more compute in parallel) did not hit local maximums for memory and read/write speeds. As noted above, running the threads in parallel did hit a bottleneck somewhere but I am not sure where.
If you want to try this for yourself, you can find the GitHub project here. It is built for Postgres + dbt-core 1.0.0, so can’t guarantee it works in other environments.
Hat tip to Derek for sparking my curiosity and putting his code out there so that I could use it.
PS – The best two-word combo I could come up using this code is: EARLS + TONIC.
For some, getting into data analytics outside of an academic or work environment can be very challenging – where do you start? Which database do you use? And how do you do it for low or zero cost?
In this article, I am going to walk through setting up your VM1 & database, connecting to your new remote server using Azure Data Studio, and as a bonus, connecting it to dbt. I’ve also written about setting up dbt on windows on a previous post.
First, let’s talk about requirements & recommendations:
This tutorial is focused on Windows 10 + Linux. You will need Windows 10 Pro where you install your VM.
I recommend that you set up your database on different physical machine than your dev machine. You should probably have at least 32GB of RAM.
Since we are installing the database on another machine, that machine needs to be on the same network as your development machine.
Why use a VM at all?In my experience, running a database on your dev machine makes everything extremely slow. Your database will be very greedy with resources (RAM specifically) – so keeping it in a little box that you can turn on and off allows you to keep using your machine “as normal”.
Step 1: Enable HyperV
Open powershell as administrator and run the following command:
You will need to restart your machine in order to use the HyperV features, so machine sure to do that first. The Microsoft documents to create a VM are exellent – and linked below. Make sure to select Ubuntu 20.04 when you create it.
We will do the install of SQL Server2 in the CLI on Ubuntu, which MS has laid out again very nicely in their documentation. A couple of notes when walking through this:
Make sure to select “SQL Server Express” as your edition. It limits your database size to 9GB but is otherwise relatively unencumbered by MS licensing.
Write down your SA password. You will need it later when connecting.
Step 4: Update the settings of your virtual switch
The default settings inside HyperV is for an “internal network” on your VM. This is fine if you are accessing your VM from the machine its running on, but the whole point here is that you want it to be a “remote server”. Set the virtual switch to “external network” and you can then access your VM from any machine on your network.
Step 5: Install Azure Data Studio on your dev machine – and write some SQL!
On your dev machine, make sure you can ping your VM. In my case, my VM is named “jacob-virtual-machine”, so the command to validate I can reach it is:
ping jacob-virtual-machine
If you can’t ping your VM, you have some networking issues to sort out. While I am no expert here, you will want to make sure you can see your VM outside the host (Step 4, above) and that port 1433 is open on the host and the VM.
Once that is resolved, you can download and install Azure Data Studio3. Now, with the credentials from above and you VM name, you can connect to your remote server. Everything can be left on defaults, but the avoidance of doubt, check out my connection settings below.
SQL Server Connection Settings
Now you have it all working and you have your own nice empty database to play with!
Bonus Content: Connect dbt to SQL Server
For those of you wishing to use dbt with SQL Server, check out the dbt-sqlserver github. It has great details, but I’ll summarize the key bits.
You will need to install the dbt connector:
pip install dbt-sqlserver
I also find their explanation of the profiles.yml file kind of confusing, so I’ve included my own below for reference:
1 You can also probably do this with WSL2, and not install a Linux VM. However, I am going to be running more software on the VM later and I want to split it to another machine. You can also use docker over top of all of this, which I may cover in another post. 2 I’m choosing SQL Server for a couple reasons: I am familiar with it and the documentation and community are large. PostgreSQL also works here, which has the advantage of having a default dbt connector. 3 SSMS works here too, but Azure Data Studio has the advantage of being cross platform. If you are using dbt, you need a SQL runner anyway as the VS code options aren’t great.
I was getting a little frustrated with the web interface of dbt cloud, and just wanted to feel more “in control” of my environment. Which lead to this twitter thread:
So uh…what IDE are y’all using with dbt? I’m not really enjoying using the web browser.
Which led to lots of good recommendations (for Atom, POP SQL, vim+tmux, DeepChannel, and some others) but ultimately I settled on VS Code after a few auspicious DMs.
The process to install dbt on Win10 isn’t exactly friendly for an analyst using dbt without engineering experience, so I wanted to share my journey and hopefully make yours easier too.
Step 0: Install Python
Note: These steps have been tested with Python 3.9.6 and earlier. As of October 15th, 2021, Python 3.10.x is not working!
Before you do anything else, install python. Make sure to check the box to “Add Python to PATH”. If you don’t, you can only run it explicitly.
low quality screenshot – but peep the box at the bottom.
If you miss this step, you have two options: 1 – re-install of python and check the “Add Python to PATH” box. 2 – manually add the PATH for python; one example linked here.
To confirm it’s working, open the command line and enter ‘py –version’. It should return the version of python you installed. If you get an error, most likely it is a PATH issue.
As a quick call out, you need MS Build tools for MSVC v140 or higher, which is an optional component of the C++ build tools.
more low quality images, but check the right box.
The MS Build tool install takes a bit of time, so I would do this when you have a little bit of time (15 minutes or so), and you will need to restart your computer.
Step 2: Config your VS Code Environment
There are a few items that need to be done to get VS Code ready for dbt, so I will list them here.
Open the command palette (Ctrl+Shift+P), and type ‘Python: Select Interpreter’. It should then bring up and allow you to select your python interpreter.
Take a look at this article for more suggested plug-ins from the dbt team.
Open your command line, and update pip to the latest version with the command ‘pip install –upgrade pip’.
If you get an error here, you may need to run it with the ‘–user’ flag as well, but I got that behavior inconsistently.
Step 3: Install dbt on Win10
If you’ve made it this far, congrats. If you are finding this article because your ‘pip install dbt’ isn’t working, go back to the top and work through the above steps first.
Note: As of October 15th, 2021, this is paragraph is no longer required, but I’ve kept it for historical reasons.In your command line, run the following: ‘pip install dbt –no-use-pep517 cryptography‘. The dependency chain is broken somewhere and this flag fixes it. Do I know why? No. Do I care? Also, no.
Go ahead and run ‘pip install dbt’ in your CLI. This takes a few minutes to run (5-10 mins), but when it’s done, you can check by running ‘dbt –version’ in the CLI. It should return the latest version (as of this update, 0.20.1).
Lastly, I recommend running ‘dbt init‘ to set up your initial ‘.dbt’ folder that holds your profiles.yml file to allow you to connect to your data warehouse. If you don’t run it, you will just need to create that file by hand later. Since that file contains your credentials, it is best practice to put that in another place outside of your source control.
And with that, you are ready to connect to your repo and begin working on your dbt project. And lastly – share your Ws on twitter!
honestly don't even care that it took me all evening, but getting dbt running locally feels like a big W for a monday.